Sunday, March 10, 2019

Bakery Style Choco-Chip Muffins

Haven't tried them yet, but planning too:-) Sounds good and I expect they are, this blogger is so good.....I send a lot of her stuff to you:-)
THANKS

https://sallysbakingaddiction.com/bakery-style-chocolate-chip-muffins/

=====================================================================

Friday, March 1, 2019

Lemon Bars with Shortbread Crust

Haven't tried this yet but I WILL!!!!!
It sounds great so have to share-----this site is so worth getting emails from!

https://sallysbakingaddiction.com/lemon-bars-recipe/

================================================================

Wednesday, February 27, 2019

The perfect Buttercream Icing

Here is the link:
Sounds delicious and I will eventually try it but wanted to just share it today.
Anything from "Sally's Baking Addiction" has been perfect...this has to be too:-)

https://sallysbakingaddiction.com/vanilla-buttercream/


Thursday, February 21, 2019

Slow Cooker Chicken Tortilla Soup

This was shared on FB at Foodie Bits and I am sharing the link.....I am going to try this asap....I have such a long list to try!!! LOL
=============
https://www.delish.com/cooking/recipe-ideas/recipes/a51825/best-slow-cooker-chicken-tortilla-soup-recipe/?fbclid=IwAR3s6HxMwsF2IG-JW_zZq8Osw7jTo3lykMUuVwV5vUDSwJCQ88coe3D7Xq4


Hope you like it!!!!


Tuesday, January 1, 2019

Crock Pot oniony Pork Chops

READY IN:
 5hrs 25mins
SERVES:
 4-6
UNITS:
 US

INGREDIENTSNutrition

DIRECTIONS

  1. In a skillet, heat oil over medium-high heat and brown pork chops on both sides; place in bottom of slow cooker when browned.
  2. In same skillet, reduce heat to medium and saute onions until softened; add garlic, dry mustard, salt and pepper, and cayenne and cook, stirring, for 1 minute.
  3. Add flour and cook, stirring, for 1 minute.
  4. Add vinegar and wine and cook until thickened.
  5. Pour this mixture over pork chops, put lid on crock pot and cook on Low for 4 to 5 hours or on High for 2 to 2-1/2 hours (I did Low for 4-1/2 hours), or just until pork is tender.
  6. Remove pork chops from slow cooker and place on a warmed platter.
  7. Stir Dijon mustard and whipping cream into juices in slow cooker; when well combined, turn slow cooker off and pour sauce over chops on platter and serve immediately.

Bourbon-Glazed Pork Chops

this has to be good!!!
==============================

From Genius Kitchen;
https://www.geniuskitchen.com/recipe/bourbon-glazed-pork-chops-155231

READY IN:
 54mins
SERVES:
 6
UNITS:
 US

INGREDIENTSNutrition

============================

DIRECTIONS

  1. In a shallow dish or large zip-lock heavy-duty freezer bag, stir together the first 6 ingredients; add in pork chops.
  2. Cover dish or seal bag and chill 30 minutes, turning once.
  3. Remove pork from marinade, reserving marinade.
  4. Grill pork over med-high heat, covered w/ grill lid for 10-12 minutes (or until done), turning once.
  5. Transfer reserved marinade to a saucepan; bring to a boil; cook, stirring occasionally, for 2 minutes.
  6. Pour sauce over chop and serve.


===============================


Homemade Bagels

I know!!! Not many people want to do this but I am going to try it and decided to share it. Got this recipe from
Sally's Baking Addiction

give it a chance.....and Happy New Year!
----------------------------------------------------

Homemade Bagels

Make fresh bagels right at home with this tested dough recipe. Don't skip the water bath and egg wash-- both provide an extra chewy and golden brown crust.

Ingredients:

  • 1 and 1/2 cups warm water (between 100-110°F, 38-43°C)
  • 2 and 3/4 teaspoons instant or active dry yeast*
  • 4 cups bread flour, plus more for work surface and hands*
  • 1 Tablespoon packed light or dark brown sugar (or barley malt syrup)*
  • 2 teaspoons salt
  • coating the bowl: nonstick spray or 1 Tablespoon olive oil
  • egg wash: 1 egg white beaten with 1 Tablespoon water
For Boiling
  • 2 quarts water
  • 1/4 cup honey (or barley malt syrup)*

Directions:

  1. Prepare the dough: Whisk the warm water and yeast together in the bowl of your stand mixer fitted with a dough hook attachment. Cover and allow to sit for 5 minutes.
  2. Add the flour, brown sugar, and salt. Beat on low speed for 2 minutes. The dough is very stiff and will look somewhat dry.
  3. Turn the dough out onto a lightly floured surface. With lightly floured hands, knead the dough for 4-5 minutes. The dough is too heavy for the mixer to knead it!
  4. Lightly grease a large bowl with oil or nonstick spray. Place the dough in the bowl, turning it to coat all sides in the oil. Cover the bowl with aluminum foil, plastic wrap, or a clean kitchen towel.  Allow the dough to rise at room temperature for 60-90 minutes or until double in size.
  5. Line two large baking sheets with parchment paper or silicone baking mats.
  6. Shape the bagels: When the dough is ready, punch it down to release any air bubbles. Divide the dough into 8 equal pieces. (Just eyeball it-- doesn't need to be perfect!) Shape each piece into a ball. Press your index finger through the center of each ball to make a hole about 1.5 - 2 inches in diameter. Watch video above for a visual. Loosely cover the shaped bagels with kitchen towel and rest for a few minutes as you prepare the water bath.
  7. Preheat oven to 425°F (218°C).
  8. Water bath: Fill a large, wide pot with 2 quarts of water. Whisk in the honey. Bring water to a boil, then reduce heat to medium-high. Drop bagels in, 2-4 at a time, making sure they have enough room to float around. Cook the bagels for 1 minute on each side.
  9. Using a pastry brush, brush the egg wash on top and around the sides of each bagel. Place 4 bagels onto each lined baking sheet. Bake for 20-25 minutes, rotating the pan halfway through. You want the bagels to be a dark golden brown. Remove from the oven and allow bagels to cool on the baking sheets for 20 minutes, then transfer to a wire rack to cool completely.
  10. Slice, toast, top, whatever you want! Cover leftover bagels tightly and store at room temperature for a few days or in the refrigerator for up to 1 week.
Overnight: Prepare the dough through step 4, allowing the dough to rise overnight in the refrigerator. The slow rise gives the bagels wonderful flavor! In the morning, continue with step 5. I don't recommend shaping the bagels the night before as they may puff up too much overnight.
Freezing: Baked bagels freeze wonderfully! Freeze them for up to 3 months, thaw overnight in the refrigerator or at room temperature, then warm to your liking. You can also freeze the bagel dough. After punching down the dough in step 6, wrap the dough tightly in plastic wrap, then a layer of aluminum foil. Freeze for up to 3 months. Thaw overnight in the refrigerator, then punch the dough down again to release any air bubbles. Continue with the rest of step 6.

Recipe Notes:

  1. Special Equipment: stand mixer fitted with a dough hook attachment, large baking sheets (I love these), big pot (I use my 5.5 quart dutch oven), pastry brush.
  2. Yeast: Use instant or active dry yeast. If using active dry yeast, the rise time may be up to 2 hours.
  3. Bread Flour: Bagels require a high protein flour. Bread flour is a must.
  4. Barley Malt Syrup: This ingredient can be a little hard to find, but truly gives bagels that traditional malty flavor we all know and love. Most natural food stores carry it. I offer alternatives such as brown sugar in the dough and honey in the water bath; I've made bagels with these alternatives AND with barley malt syrup and honestly love both versions.
  5. Bread machine: Place the dough ingredients into the pan of the machine. Program the machine to dough or manual, then start. After 9-10 minutes, the dough will be quite stiff. Allow the machine to complete its cycle, then continue with the recipe.
  6. By hand: If you do not have a mixer, you can mix the dough together in a large bowl then knead by hand for 10-15 minutes.
  7. Bagel Varieties: See blog post above for various add-ins and toppings. Note that the toppings are added after the egg wash in step 9. Some readers have used this bagel recipe to make whole wheat bagels by replacing half of the bread flour with whole wheat flour. I haven't tried it, but let me know if you do!
Adapted from a mix of recipes I've tried: King Arthur FlourCook's Illustrated, and Complete Book of Breads

DID YOU MAKE A RECIPE?

Tag @sallysbakeblog on Instagram and hashtag it #sallysbakingaddiction.
© Sally’s Baking Addiction. All images & content are copyright protected. Please do not use my images without prior permission. If you want to republish this recipe, please re-write the recipe in your own words, or link back to this post for the recipe. Some of the links above are affiliate links, which pay me a small commission for my referral at no extra cost to you! Thank you for supporting Sally’s Baking Addiction.

Friday, December 21, 2018

Annette’s Amazing Breakfast Bake

So many good things come through my email!!!! Got this from another author.....Hope Callaghan.....no wonder I love Cozy Mysteries:-)
It sounded good and easy so sharing!!!!
MERRY CHRISTMAS!!!


================================================================

Annette’s Amazing Breakfast Bake

Ingredients:
1 pound ground pork sausage (or turkey sausage)
1 teaspoon mustard powder
1/2 teaspoon salt (optional)
8 eggs, beaten
2 cups milk
2 stalks chopped scallion (optional)
7 cups frozen hash browns
8 ounces mild Cheddar cheese, shredded (or sharp cheddar)

Directions:
Crumble sausage into a medium skillet. Cook over medium heat until evenly brown; drain.
In a medium bowl, mix together mustard powder, salt, eggs and milk. Add the sausage, hash browns, cheese, and scallion and stir to coat evenly. Pour into a greased 9x13 inch baking dish. Cover and chill in the refrigerator for 8 hours, or overnight.
Preheat oven to 350 degrees F (175 degrees C).
Cover and bake 45 to 60 minutes. Uncover, and reduce temperature to 325 degrees F (165 degrees C). Bake for an additional 30 minutes, or until set.



Thursday, December 20, 2018

Slow Cooker Ham

Got this from one of the mystery authors I follow....Gillian Baker....simple, easy......
ENJOY!

======================================================
Slow Cooker Ham
You'll need:
Approx. 7-8# smoked (precooked) spiral ham

Oval 6-quart slow cooker 
Slow cooker liners (Hey, I don't wanna do dishes either!)
                                  
Rub brown sugar on the ham. Once the ham is in the slow cooker, pour some pure maple syrup over it (2/3 cup or so). Next, add a little (or a lot) of pineapple juice. Bake on low for 4ish hours. If you bake it too long, it will be so dry that not even your hubby and daughter will eat it. Just sayin'. ;) If you buy too large of a ham, just trim it so it will fit or stuff it in there and trim off the too-cooked bits later. 

Wednesday, December 19, 2018

I just got a question about what to do with the Caramel..............
The same author of that recipe has this;

50 ways to eat Salted Caramel......here is the link.......

https://sallysbakingaddiction.com/50-ways-to-eat-salted-caramel/

sounds delicious! I am not a chocolate person I am a Caramel person!!!
enjoy!!!!!


I copied this right off the page, this just sounds too good!!!!
Enjoy!!!!
=================================================================
This delicious recipe brought to you by Sally's Baking Addiction 
https://sallysbakingaddiction.com/homemade-salted-caramel-recipe/

Homemade Salted Caramel Sauce

Follow these easy instructions to create sweet salted caramel sauce at home. Perfect for cakes, cupcakes, cookies, ice cream, cheesecake, sweet breads and more!

Ingredients:

  • 1 cup (200g) granulated sugar
  • 6 Tablespoons (90g) salted butter, room temperature cut up into 6 pieces1
  • 1/2 cup (120ml) heavy cream2
  • 1 teaspoon salt

Directions:

  1. Heat granulated sugar in a medium saucepan over medium heat, stirring constantly with a high heat resistant rubber spatula or wooden spoon.
  2. Sugar will form clumps and eventually melt into a thick brown, amber-colored liquid as you continue to stir. Be careful not to burn.
  3. Once sugar is completely melted, immediately add the butter. Be careful in this step because the caramel will bubble rapidly when the butter is added.
  4. Stir the butter into the caramel until it is completely melted, about 2-3 minutes. A whisk helps if you find the butter is separating from the sugar.
  5. Very slowly, drizzle in 1/2 cup of heavy cream while stirring. Since the heavy cream is colder than the caramel, the mixture will rapidly bubble and/or splatter when added.
  6. Allow the mixture to boil for 1 minute. It will rise in the pan as it boils.
  7. Remove from heat and stir in 1 teaspoon of salt. Allow to cool down before using.
  8. Make ahead tip: You can make this caramel in advance. Make sure it is covered tightly and store it for up to 2 weeks in the refrigerator. Warm the caramel up for a few seconds before using in a recipe. This caramel is OK at room temperature for a day if you're traveling or gifting it.

Recipe Notes:

  1. Unsalted butter may be used instead, though I prefer salted. No other changes need to be made to the recipe if using unsalted.
  2. Heavy cream (approximately 36% milk fat) may also be sold as whipping cream. Light whipping cream (30% milk fat), or double cream (48% milk fat) may be substituted. Do not use milk. Room temperature cream is best.
  3. If you want to make regular caramel, reduce salt to 1/2 teaspoon. Do not leave it out completely.
  4. Avoid doubling or tripling this recipe. The added volume could prevent the sugar from melting evenly and properly. Make a couple batches instead.

DID YOU MAKE A RECIPE?

Tag @sallysbakeblog on Instagram and hashtag it #sallysbakingaddiction.

Monday, December 17, 2018

PB & Chocolate rice Krispie Bars

Sent to me from a friend......have not tried it-----YET!

=============================
PB & Chocolate Rice Krispie Bars
 
 
Combine 1 cup sugar and 1 cup corn syrup in a large heavy pan.
   
Bring to a boil and boil for ONE minute.  Overcooking makes rice krispies hard.  You want chewy.
Remove from heat and stir in 1 cup peanut butter
 
Add 6 cups rice krispies and stir to combine.
 
Pour out into a jellyroll pan.  Mixture won't fill the pan.  Push it all together to form a layer even with the lip of the jellyroll pan.  Set aside.
 
Combine 1 large package milk chocolate chips and 1 package butter scotch chips in a microwaveable bowl.  Mike for 1.5 minutes.  Remove and stir...mixture s/b melting.  Mike for 10-15 seconds at a time now and stir til chips are melted.  Pour onto rice krispies, smooth out to form chocolate icing.  Set aside for the chocolate to set up.  2 or 3 hours.
 
Hints:  Kellogg's Rice Krispies and Nestle's Milk Chocolate chips and butterscotch chips give the best "do."
You can use either crunchy or plain peanut butter...whatever you like best.
This recipe doubles just fine. 
 
If you overmike the chip mixture, it will harden and break into teeny little icky pieces.  How do I know that?  Umm...don't ask!  Smile and chew...then hide a few

Sunday, December 16, 2018

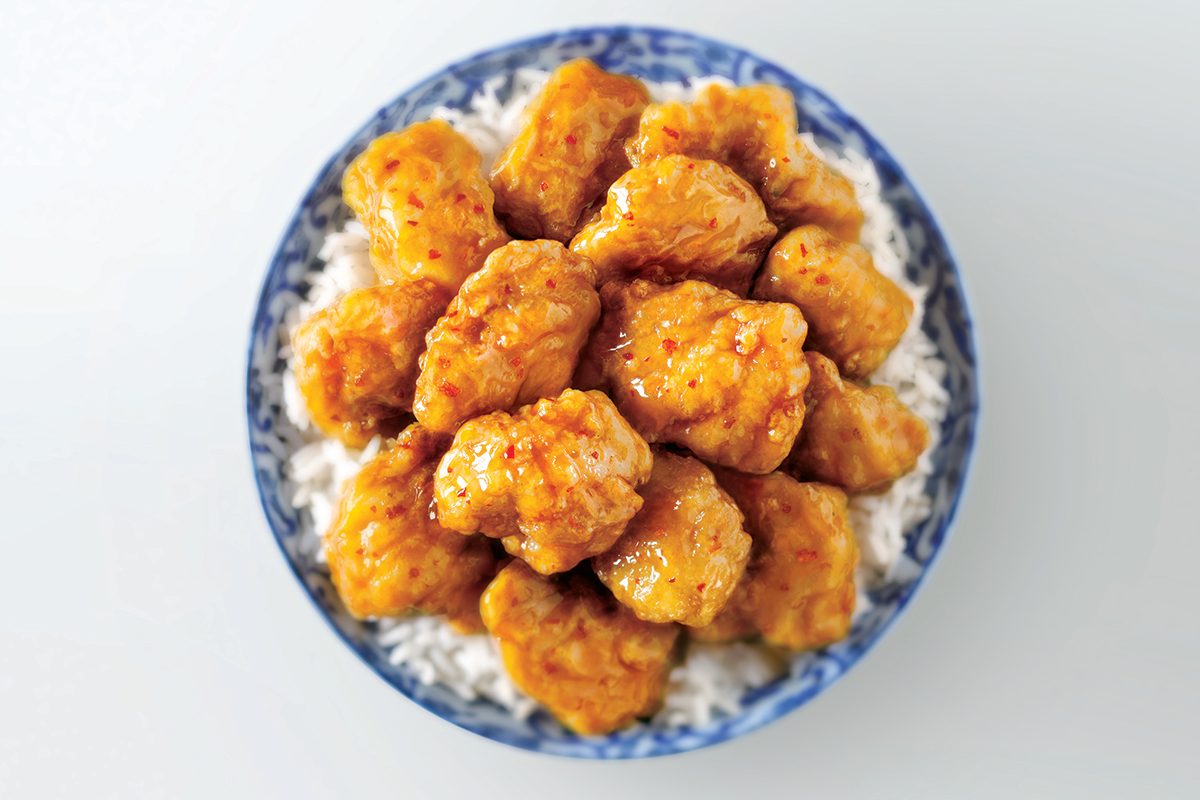
Panda Express Orange Chicken

Panda Express

The Real Panda Express Orange Chicken Recipe

What You Need:

  • 4 boneless, skinless chicken breasts
  • 3 Tbsp. soy sauce, divided
  • 2 Tbsp. white wine (or rice wine)
  • 2 tsp. minced ginger
  • 1 clove of garlic, minced
  • ¼ cup plus 1 Tbsp. cornstarch, divided
  • Canola oil, for frying
  • 1 Tbsp. honey
  • 2/3 cup orange juice
  • 1 Tbsp. orange marmalade
  • 1 Tbsp. rice vinegar
  • ¼ tsp. crushed red chili flakes
  • ¼ tsp. sesame oil

Step 1: Marinate Chicken

Start by cutting the chicken into small, bite-size pieces—about 1 to 1-1/2 inches long. Then, whisk together two tablespoons of soy sauce, wine, ginger and garlic in a large bowl. Add the chicken and stir until the pieces are well coated. Marinate in the refrigerator for at least 25 minutes.

Step 2: Toss to Coat

Once time is up, use a large slotted spoon to move the chicken cubes out of the marinade and into a new bowl. Discard the marinade mixture. Then, sprinkle 1/4 cup of cornstarch over the chicken. Toss lightly to coat.

Step 3: Brown Chicken

Next, heat up the oil to fry the chicken pieces in a large pot—between 1/4- and 1/3-inch of oil will be enough. Then, working in batches, add a single layer of marinated chicken pieces to the hot oil. Fry, turning occasionally until the chicken is well-browned and cooked through. Each batch should take about four minutes, total. When cooked through, move the chicken pieces out of the fryer and onto a paper towel-lined plate so the excess oil can drain away.
Editor’s Tip: At this point, the chicken will be delicious on its own. Sample a piece or two, but resist the urge to eat them all. The end result is much better. Trust us.

Step 4: Make Sauce

Place a small saucepan over medium heat and add the remaining soy sauce, honey, orange juice, marmalade, rice vinegar, chili flakes and sesame oil. Stir to combine. Then, in a small bowl, mix together the remaining cornstarch and two tablespoons water. This mixture is called a slurry. Bring the orange sauce to a low boil, and add the slurry—one spoonful at a time—while whisking. Keep adding the slurry until the sauce is thickened.

Step 5: Toss Together

Combine the chicken pieces and the sauce in a large bowl. Serve with cooked rice and broccoli. Enjoy!

Sunday, November 18, 2018

You really need to know this:-)

Ever wonder how to get your homemade breads to have that "glow" on top like what you see in the grocery or bakery??? this is how!!!! and the url will follow!!!!! JSYK I like the egg and water mixture!!
=======================================================================
An egg wash is usually made with about 1 tablespoon of milk, cream, or water for each large egg, or 3 parts egg to 1 part liquid.
Using an egg wash on yeast breads, pie crusts, and other baked goods can help with the browning process and makes it possible to attach seeds, grains, chopped herbs, or sugars to the crust. An egg wash can also make the difference in the appearance and texture of the crust.
Should you use a whole egg, a yolk, or just the white? Here's a handy chart with the color, texture, and shine you can expect from each type of egg wash.
Whole Egg + MilkColor, Shine
Whole Egg + WaterSoft Crust, Shine, Color
Egg Yolk + Milk or CreamSoft Crust, Shine, Color
Egg White + WaterFirm Crust, Shine
In addition, brushing with milk or cream alone will result in a soft crust with a little color, and water alone will help achieve a crisp crust.
Salt can help loosen egg whites. Add a pinch to an egg white for easier spreading on savory breads and rolls.
An egg wash can be applied to shaped bread or rolls before or after proofing, but always before baking. If applying after proofing, use a very light touch with the brush to avoid deflating the bread. Avoid using too much egg wash, and if it does or pool in places, carefully dab with a paper towel to absorb the excess.
https://www.thespruceeats.com/egg-wash-yeast-breads-rolls-3057783